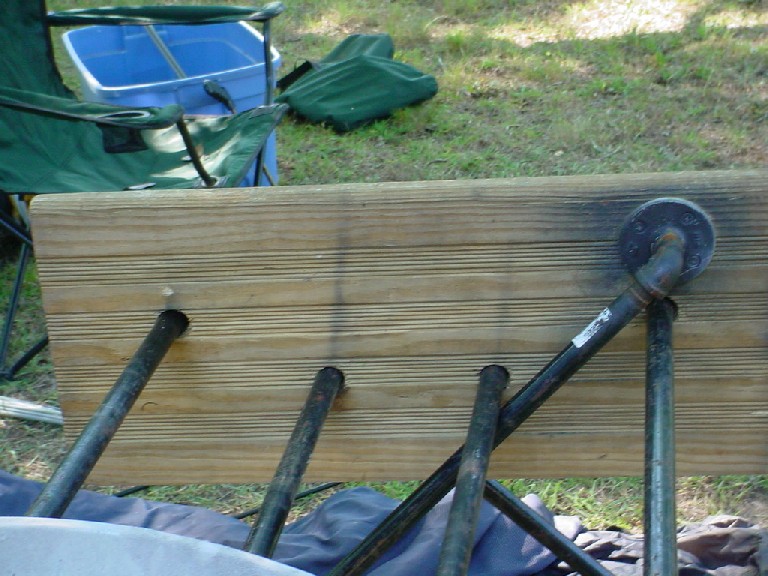
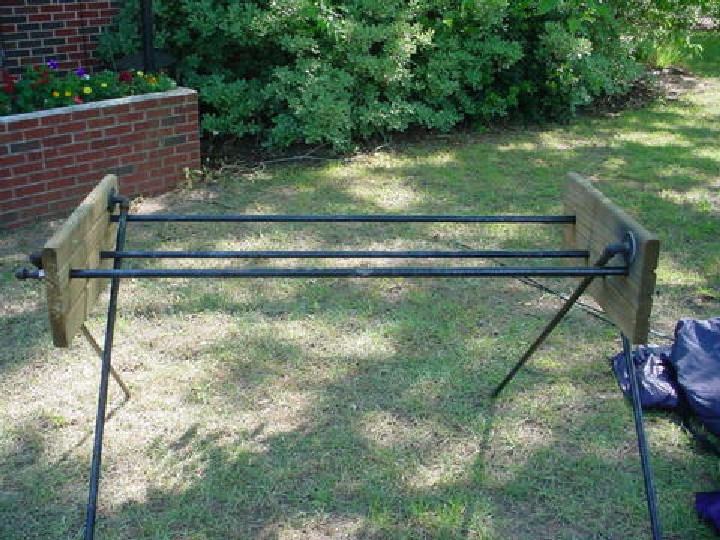
OK, I don't have any actual drawing-type plans but I'll measure
everything tomorrow and see what I can put together . I'll let you
know when I post it to the files section. Meanwhile, here's the
how-to part.
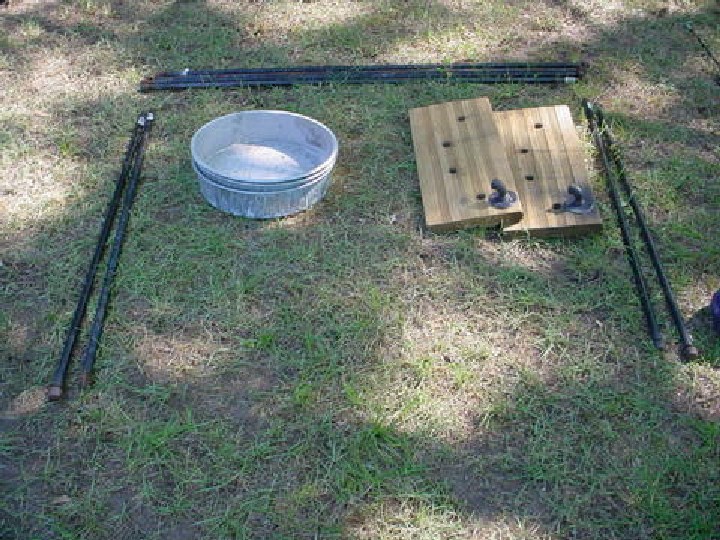
The wooden ends are from a 48" outdoor stair tread that I bought at
the local Lowe's store and cut in half making 2 - 24" sections. The
support rails are 4-60" pipes, 1/4" I.D. The original builder said
to use black iron pipe and I did, but I gotta tell you, that stuff
rusts like nobody's business. If I were doing it again, I'd use the
galvanized stuff. The pans are 14" dia. metal oil drain pans and are
scarce as hen's teeth around here. I first tried some 12" steel feed
pans and they were OK but didn't give much air flow room for my big
pots.......and I REALLY wanted the big pans anyway so I searched
through every auto parts store nearby and only found them at
O'Reily's (I didn't check NAPA). Unfortunately, each O'Reily's store
only stocks 1 pan at a time (though they will order them for you) so
I went to 3 stores in 2 cities to get them. They were worth the
trouble. The legs were my own addition. They are 48", 1/4 I.D.
pipes with caps on the bottoms to keep the dirt out and a "street-L"
to screw into on the top side. I'm not real sure just WHAT the name
of that round piece that the street-L is screwed into but you'll need
4 of them and 4 good wood screws to attach each one to the wood (16
screws total). You also need 8 more pipe end caps for the ends of
the support rails.
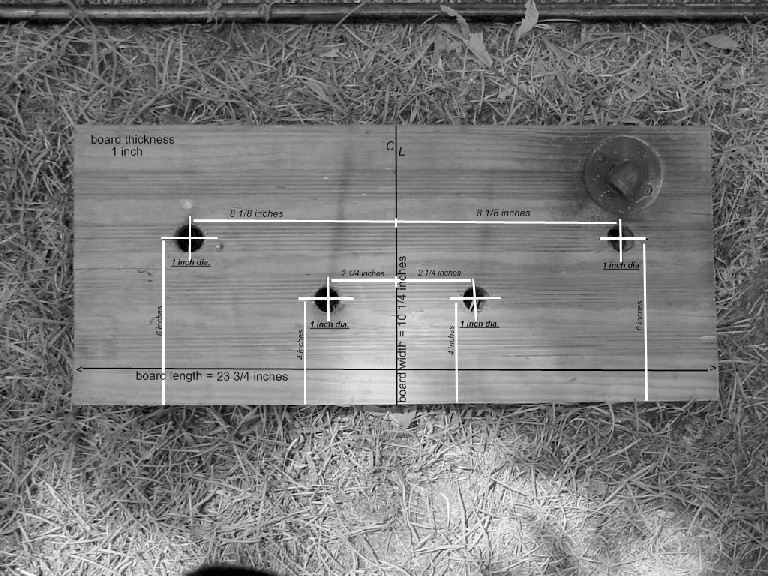
Now then, in my opinion, I wanted the bottom support rails about
1/3 of the way in from each side, If the bottom was 12", and I think
it was, I wanted the centers of the holes to be 2" on either side of
the center of the end piece when measured longways. I measured the
height of the pans top to bottom and decided how high up the sides I
wanted my upper support poles and centered about 7 1/4" each side of
the center line. Actually, I used the 4 divisions on the wooden end
piece that you can see in one of the photos for the heights and it
seemed just fine. At this time I wasn't really planning any legs yet.
The holes need to be bigger than the outside diameter of the pipes
but smaller than the outside diameter of the caps. This keeps the
pipes from sliding out when you don't want them to. Think about
that. Not pretty. Anyway, unless you're a very accurate woodworker
(I'm not) give your pipes a little wiggle room because the two sets
of holes will probably not match up perfectly. Put the caps on one
end of each support pole (pipe wrenches, small) and slide the poles
through the holes in both end pieces. Sometimes it is easier to
slide them through the first one, stand the thing on its end with the
pipes sticking up and work the second end piece down over the pipes.
It will get easier with use. Put the caps on the other ends and lay
your table top down. The pans should fit in easily.
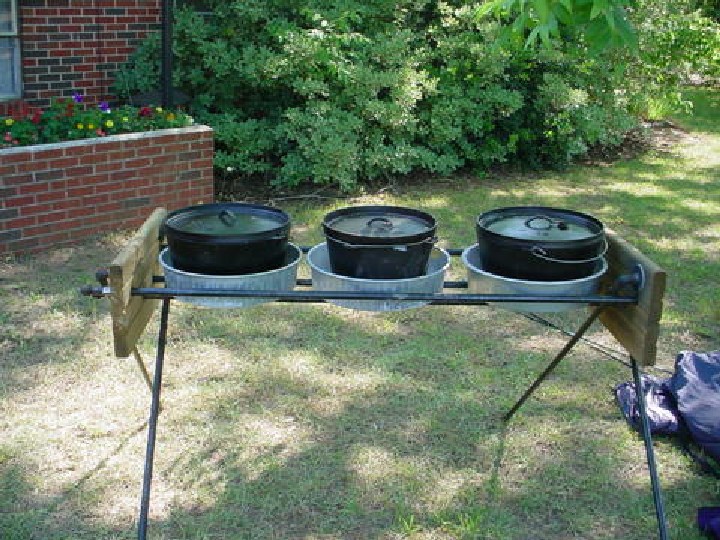
Now for the legs. Warning, this is going to be frustrating. Figure
out how high you want your table to be and fid a way to support it at
about that height. I used two sawhorses. That's also how I figured
out the height, however tall those two sawhorses made it. Now take
the street-L and screw it into the center hole of the leg-base
(whatever the name is) tighten it in as tight as humanly possible
with the wrenches because it has a tendency to shift. Do this for
each leg. Now put a cap tightly on one end of each leg and screw the
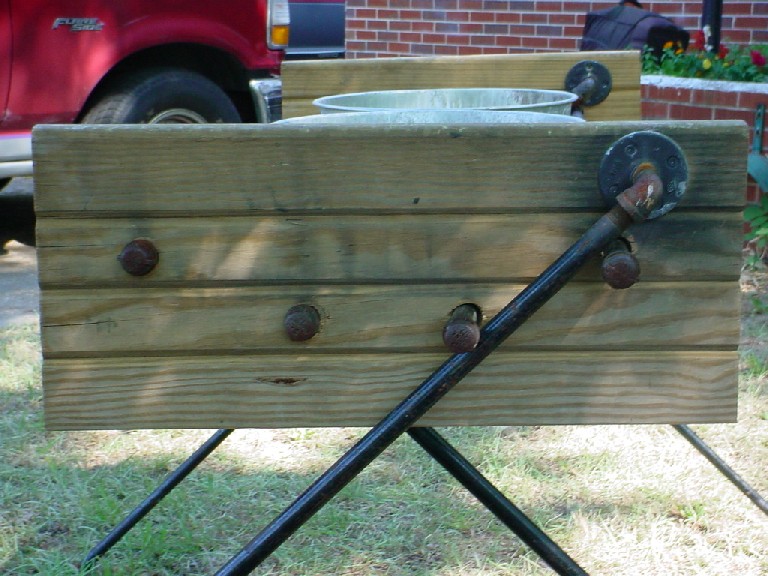
other end into the street-L. Hand tight will do here. OK, the leg-base
whatcha-ma-callits go in the upper righthand corner of the end
pieces. Start with the inside corners and thread the leg over the
outside and under the inside support pole on the right hand side.
Make it tight against the inside bar with the end pushing hard
against the ground. Now put in the wood screws, at least two, the
others can be added later. Keep the table level. Do the other
inside leg exactly the same with the base in ITS upper right corner,
threaded the same way. Check the photos to clarify. You might want
to print some out. Once the inside legs are attached, go to one end
and pull the upper and lower right hand support poles towards you
about 3". Now install the outer leg threading it the same way you did
the inner ones. Now do the other end the same way. I think you're
finished now. leave the lower support poles sticking out just enough
to brace the legs, or you could just use slightly longer poles I
guess. If you used the black iron, go ahead and get some high-temp
grill paint and paint all the iron or it will soon rust away.
